Adding Floor Plans
- Support

- Jul 9, 2021
- 1 min read
Updated: Dec 9, 2021
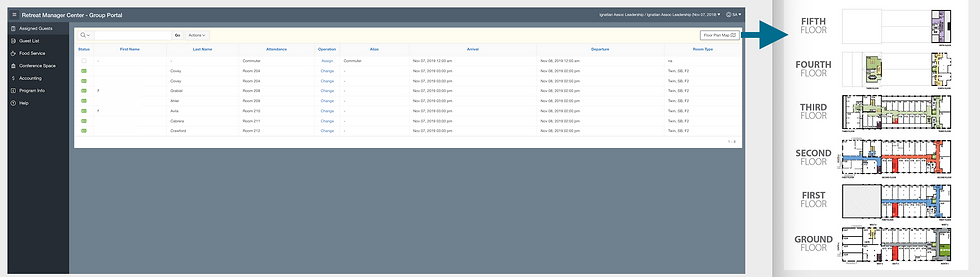
In the Group Portal group leaders place their guests in rooms, but leaders rarely know the layout of the retreat center. To assist them you can upload an image of your retreat center's floor plan to Retreat Portal and make it available to group leaders.

Instructions to Set an Image
Log in to your Retreat Portal Console and navigate to Settings > Group Portal

Select Floor Plans on the left. In 'Floor Plan A' click the Choose Image button.

In the pop-up dialog select Upload Image and then click Browse and select your retreat center's floor plan image. Once uploaded, verify the image, and give the image a meaningful name, e.g. "Floor Plan". Then click the 'Save and use' button.

Then give a meaningful, but short, description of the floor plan then click Save. The description is used in the button on the Group Portal. Something short like 'Floor Plan' or 'Floor Plan Map' is good.

Once saved your changes are immediate and the Group Portal's Assigned Guests page will show a button that will pop-up the image you just uploaded.
Instructions to Clear an Image
Repeat the steps above, but rather than clicking Choose Image click Clear Image, then click Save in Floor Plan A. Once saved the button on the Group Portal's Assigned Guests page will no longer appear.
Comments