Retreat Manager Cloud - Shortcut for all users
- Support

- Aug 25, 2021
- 2 min read
Updated: Dec 9, 2021
This tutorial will walk you through the steps of allowing one installation of Retreat Manager Cloud on a Windows desktop to be accessible to any logged in user.
This is useful in situations where you have a communal computer, e.g. a front desk, and your staff must log in as themselves rather than using a generic 'front desk' or 'receptionist' user.
Important - These steps must be executed by a user with administrative privileges on any Windows machine where this change is occurring. These steps are also best executed by someone familiar with Windows.
If you haven't already done so please install Retreat Manager Cloud following these steps: https://www.retreatportal.com/post/accessing-retreat-manager-cloud-on-windows
Step 1
Log in as the user who has Retreat Manager Cloud installed.
Step 2
On your desktop right-click on the shortcut to Retreat Manager Cloud and click Properties

Step 3
Click Open File Location

Step 4
Highlight both the .rdp and .ico files
Then hold down Ctrl+C to copy the file.

Step 5
Open Windows File Explorer
Navigate to C:\Users\Public
And hold down Ctrl+V to paste the files in C:\Users\Public
Note: You may choose a subfolder of C:\Users\Public, but you will have to remember that new location for future steps.

Step 6
On your desktop right-click on the shortcut to Retreat Manager Cloud and click Cut (this is because we're moving the shortcut to the Public Desktop)
Open Windows File Explorer (if not still open)
Navigate to C:\Users\Public\Public Desktop
Hold down Ctrl+V to paste the Retreat Manager Cloud shortcut.
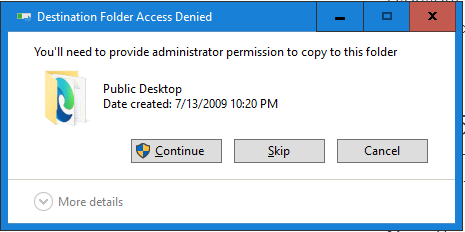
You will likely need administrator privileges to execute the copy. Click Continue if prompted.
Step 7
Right-Click on the newly pasted Retreat Manager Cloud shortcut and select Properties
Step 8
The Target will be something like this: C:\Users\ddalrymp\AppData\Local\RemotePackages\Retreat_RMC_U01.rdp change it to C:\Users\Public\Retreat_RMC_U01.rdp Or whichever directory you chose in step 5
Change Start in to be: C:\Users\Public Or whichever directory you chose in step 5
Click Change Icon button
Click Browse button
Navigate to C:\Users\Public and select the .ico file copied in step 5.
Click OK
The final Properties should look something like this

Click OK
Step 9
Navigate back to the desktop and verify the shortcut is present.
Log off and then log back in as a different user and verify the shortcut is present for the new user as well.
Comments